|
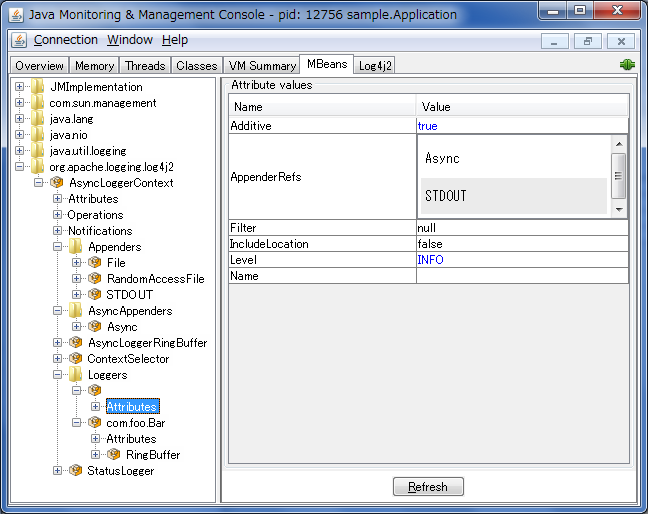
JMXLog4j 2 has built-in support for JMX. The StatusLogger, ContextSelector, and all LoggerContexts, LoggerConfigs and Appenders are instrumented with MBeans and can be remotely monitored and controlled. Also included is a simple client GUI that can be used to monitor the StatusLogger output, as well as to remotely reconfigure Log4j with a different configuration file, or to edit the current configuration directly. Enabling JMXJMX support is enabled by default. When Log4j initializes, the StatusLogger, ContextSelector, and all LoggerContexts, LoggerConfigs and Appenders are instrumented with MBeans. To disable JMX completely, and prevent these MBeans from being created, specify system property log4j2.disable.jmx=true when you start the Java VM. Local Monitoring and ManagementTo perform local monitoring you don't need to specify any system properties. The JConsole tool that is included in the Java JDK can be used to monitor your application. Start JConsole by typing $JAVA_HOME/bin/jconsole in a command shell. For more details, see Oracle's documentation on how to use JConsole. Remote Monitoring and ManagementTo enable monitoring and management from remote systems, set the following system property when starting the Java VM. com.sun.management.jmxremote.port=portNum In the property above, portNum is the port number through which you want to enable JMX RMI connections. For more details, see Oracle's documentation on Remote Monitoring and Management. Log4j Instrumented ComponentsThe best way to find out which methods and attributes of the various Log4j components are accessible via JMX is to look at the Javadoc or by exploring directly in JConsole. The screenshot below shows the Log4j MBeans in JConsole.
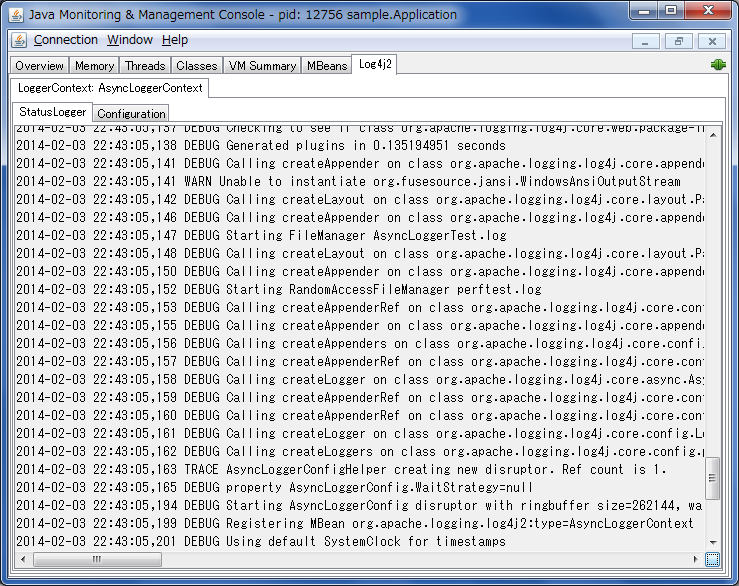
Client GUILog4j includes a basic client GUI that can be used to monitor the StatusLogger output and to remotely modify the Log4j configuration. The client GUI can be run as a stand-alone application or as a JConsole plug-in. Running the Client GUI as a JConsole Plug-inTo run the Log4j JMX Client GUI as a JConsole Plug-in, start JConsole with the following command: $JAVA_HOME/bin/jconsole -pluginpath /path/to/log4j-api-2.3.2.jar:/path/to/log4j-core-2.3.2.jar:/path/to/log4j-jmx-gui-2.3.2.jar or on Windows: %JAVA_HOME%\bin\jconsole -pluginpath \path\to\log4j-api-2.3.2.jar;\path\to\log4j-core-2.3.2.jar;\path\to\log4j-jmx-gui-2.3.2.jar If you execute the above command and connect to your application, you will see an extra "Log4j 2" tab in the JConsole window. This tab contains the client GUI, with the StatusLogger selected. The screenshot below shows the StatusLogger panel in JConsole.
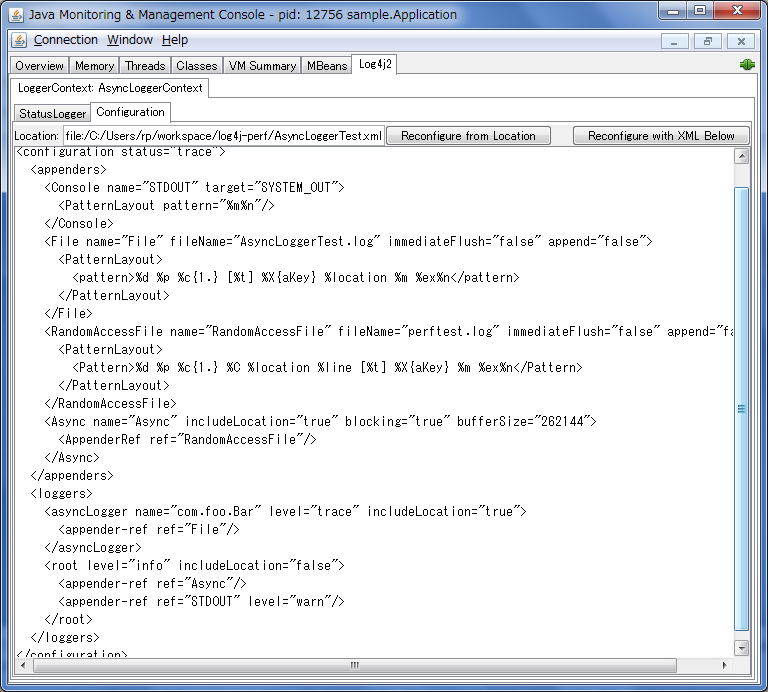
Remotely Editing the Log4j ConfigurationThe client GUI also contains a simple editor that can be used to remotely change the Log4j configuration. The screenshot below shows the configuration edit panel in JConsole.
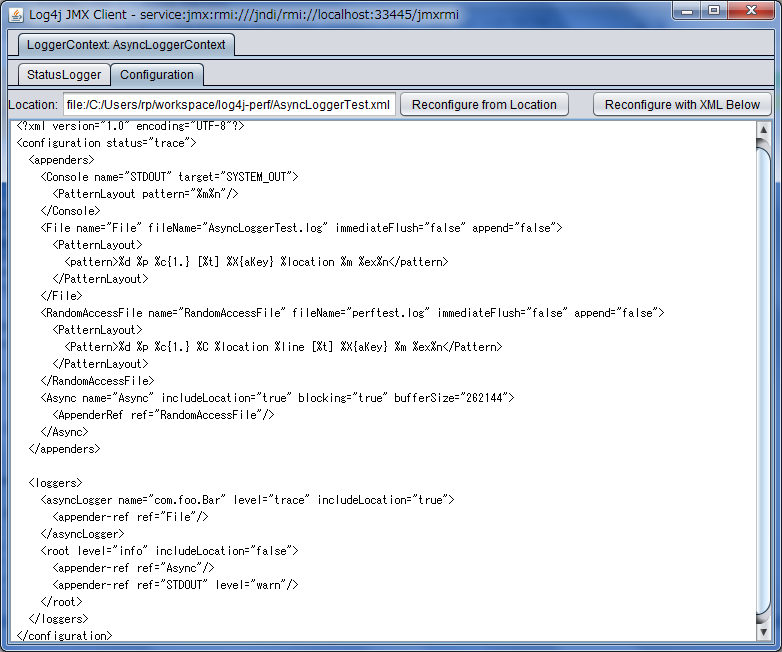
The configuration edit panel provides two ways to modify the Log4j configuration: specifying a different configuration location URI, or modifying the configuration XML directly in the editor panel. If you specify a different configuration location URI and click the "Reconfigure from Location" button, the specified file or resource must exist and be readable by the application, or an error will occur and the configuration will not change. If an error occurred while processing the contents of the specified resource, Log4j will keep its original configuration, but the editor panel will show the contents of the file you specified. The text area showing the contents of the configuration file is editable, and you can directly modify the configuration in this editor panel. Clicking the "Reconfigure with XML below" button will send the configuration text to the remote application where it will be used to reconfigure Log4j on the fly. This will not overwrite any configuration file. Reconfiguring with text from the editor happens in memory only and the text is not permanently stored anywhere. Running the Client GUI as a Stand-alone ApplicationTo run the Log4j JMX Client GUI as a stand-alone application, run the following command: $JAVA_HOME/bin/java -cp /path/to/log4j-api-2.3.2.jar:/path/to/log4j-core-2.3.2.jar:/path/to/log4j-jmx-gui-2.3.2.jar org.apache.logging.log4j.jmx.gui.ClientGui <options> or on Windows: %JAVA_HOME%\bin\java -cp \path\to\log4j-api-2.3.2.jar;\path\to\log4j-core-2.3.2.jar;\path\to\log4j-jmx-gui-2.3.2.jar org.apache.logging.log4j.jmx.gui.ClientGui <options> Where options are one of the following:
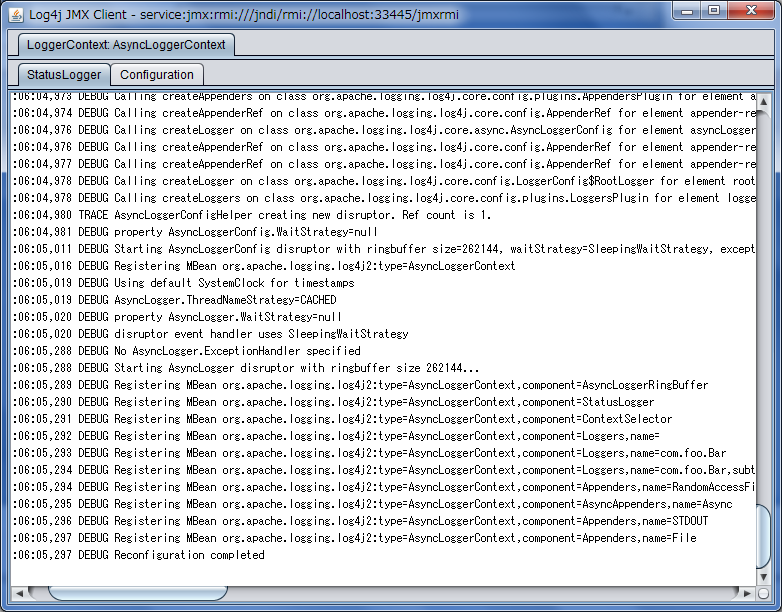
The port number must be the same as the portNum specified when you started the application you want to monitor. For example, if you started your application with these options: com.sun.management.jmxremote.port=33445 com.sun.management.jmxremote.authenticate=false com.sun.management.jmxremote.ssl=false (Note that this disables all security so this is not recommended for production environments. Oracle's documentation on Remote Monitoring and Management provides details on how to configure JMX more securely with password authentication and SSL.) Then you can run the client with this command: $JAVA_HOME/bin/java -cp /path/to/log4j-api-2.3.2.jar:/path/to/log4j-core-2.3.2.jar:/path/to/log4j-jmx-gui-2.3.2.jar org.apache.logging.log4j.jmx.gui.ClientGui localhost:33445 or on Windows: %JAVA_HOME%\bin\java -cp \path\to\log4j-api-2.3.2.jar;\path\to\log4j-core-2.3.2.jar;\path\to\log4j-jmx-gui-2.3.2.jar org.apache.logging.log4j.jmx.gui.ClientGui localhost:33445 The screenshot below shows the StatusLogger panel of the client GUI when running as a stand-alone application.
The screenshot below shows the configuration editor panel of the client GUI when running as a stand-alone application.
|